Finderで選択したフォルダをVisual Studio Codeで開くAlfred Workflowの作り方

Finderで選択しているフォルダやファイルを、Visual Studio Codeで開くWorkflowの作り方を紹介しておきます。
作り方といっても、既に「Open with Sublime Text」というWorkflowを作ってくれてる人がいるので、このWorkflowを基にして、Sublime Textが開く部分をVisual Studio Codeに変更して作成します。
Open with Sublime Textのインポート

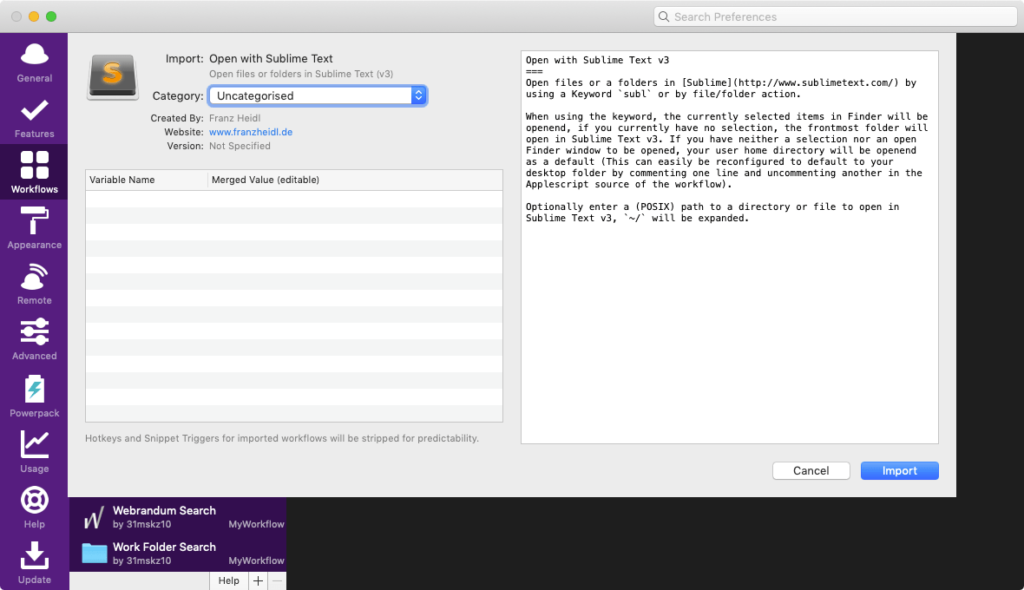
まずはGitHubのページから、「Open with Sublime Text」をダウンロードします。
「Open with Sublime Text.alfredworkflow」というファイルが入ってあるので、それをダウンロードしてダブルクリックすると、Alfredにインポートできます。
Visual Studio Codeで開くように修正
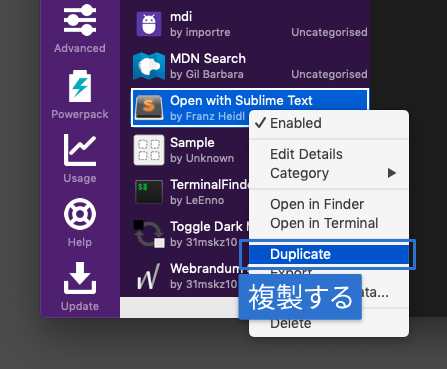
インポートしたら、念のためそのWorkflowを複製しておきます。
Workflowを右クリックして[Duplicate]をクリックすると複製できます。
インストールしたら、「Sublime Text」になっているところを「Visual Studio Code」に変えていきます。
- テキストが「Sublime Text」になっているのを「Visual Studio Code」に変更
- アイコンをVisual Studio Codeのものに変更
- キーワードが「subl」なのを「vs」などに変更する
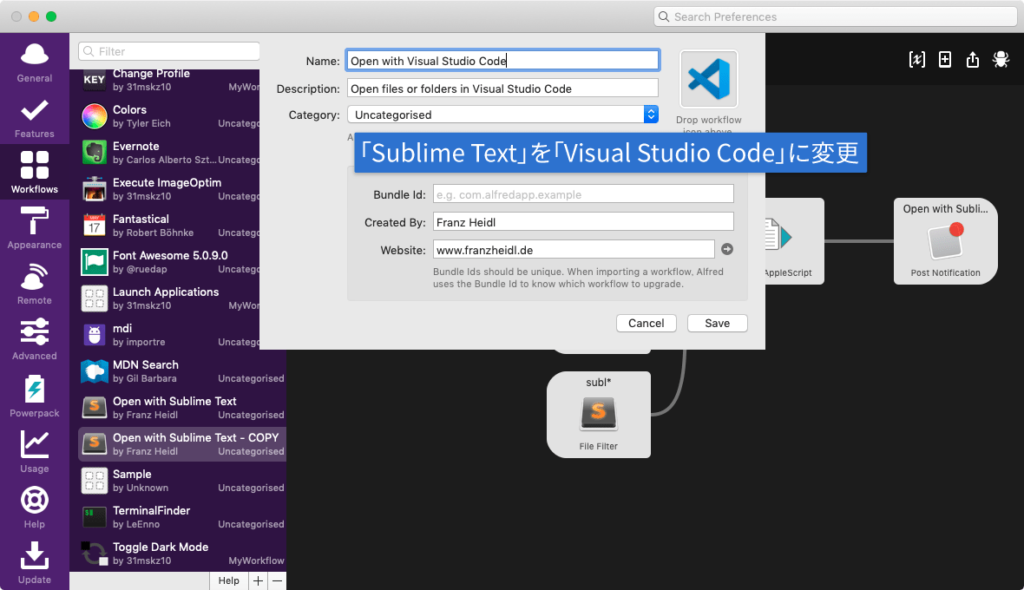
「Run NSAppleScript」をダブルクリックして、開くアプリを「Sublime Text」から「Visual Studio Code」に変更します。
具体的にはset appPath to path to application "Sublime Text"の部分をVisual Studio Codeに変えます。
これでFinderで選択しているフォルダやファイルをVisual Studio Codeで開けるようになります。
Path Finderのパスも取得するようにしたい
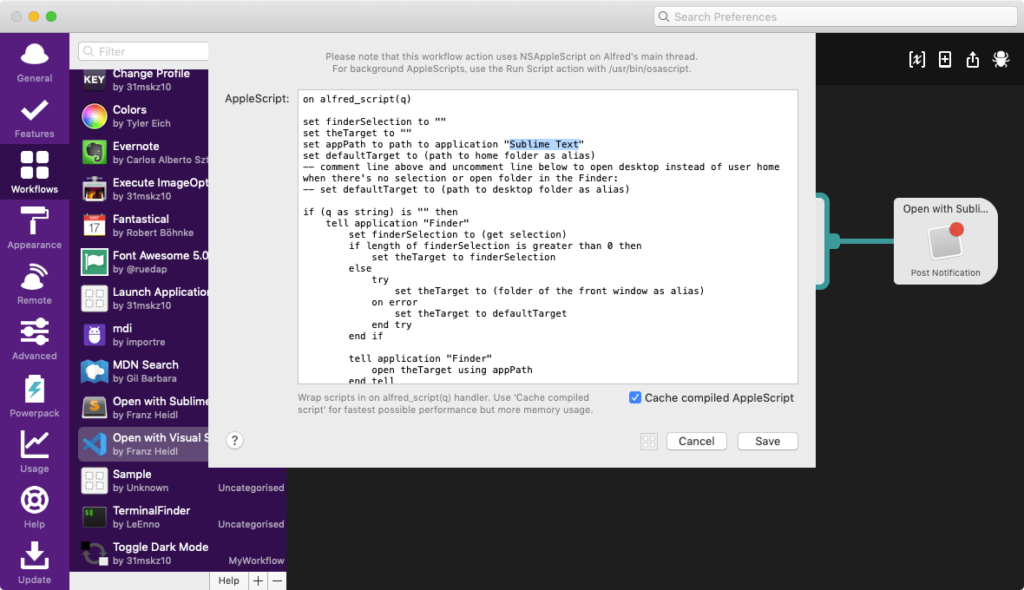
このままでは、Finderの選択フォルダは開けるのですが、Path Finderの選択フォルダは開けません。
そこで、「Run NSAppleScript」の処理を書き換えて、Path Finderの選択フォルダも開けるようにします。
on alfred_script(q)
    set finderSelection to ""
    set theTarget to ""
    set appName to "Visual Studio Code"
    set appPath to path to application appName
    set defaultTarget to (path to home folder as alias)
    tell application "System Events"
        set selectApp to name of the first process whose frontmost is true
    end tell
    -- comment line above and uncomment line below to open desktop instead of user home when there's no selection or open folder in the Finder:
    -- set defaultTarget to (path to desktop folder as alias)

    if (q as string) is "" then
        if selectApp is "Finder" then
            tell application "Finder"
                set finderSelection to (get selection)
                if length of finderSelection is greater than 0 then
                    set theTarget to finderSelection
                else
                    try
                        set theTarget to (folder of the front window as alias)
                    on error
                        set theTarget to defaultTarget
                    end try
                end if
                tell application "Finder"
                    open theTarget using appPath
                end tell
            end tell
        else
            tell application "Path Finder"
                set theTarget to POSIX path of the target of the front finder window
            end tell
            tell application appName
                open theTarget
            end tell
        end if
    else
        try
            set targets to {}
            set oldDelimiters to text item delimiters
            set text item delimiters to tab
            set qArray to every text item of q
            set text item delimiters to oldDelimiters
            repeat with atarget in qArray

                if atarget starts with "~" then
                    set userHome to POSIX path of (path to home folder)
                    if userHome ends with "/" then
                        set userHome to characters 1 thru -2 of userHome as string
                    end if
                    try
                        set atarget to userHome & characters 2 thru -1 of atarget as string
                    on error
                        set atarget to userHome
                    end try
                end if

                set targetAlias to ((POSIX file atarget) as alias)
                set targets to targets & targetAlias
            end repeat
            set theTarget to targets
            tell application "Finder"
                open theTarget using appPath
            end tell

        on error
            return (atarget as string) & " is not a valid file or folder path."
        end try
    end if
end alfred_scriptこのset appName to "Visual Studio Code"のアプリケーション名を変えれば他のテキストエディタも開けるようになるので、複数使っているのであれば複製して用意しておくと、便利になりそうです。